

 Information
Notifications
Tutorials
11. Use Color Fill for the Undercoat
It's convenient to color each part separately, so that you will be able to easily change selections and use them as clippings later. At that time, it's acceptable to use the Brush tool and the Eraser tool, but if there is an area enclosed by a line then you can fill it in completely with the Bucket tool.
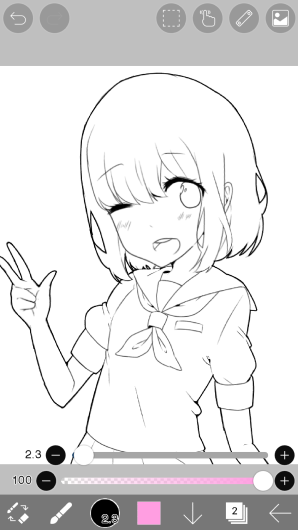
An area like this that is enclosed in solid lines can be filled in using the Bucket tool. Next we'll add a layer for an undercoat.
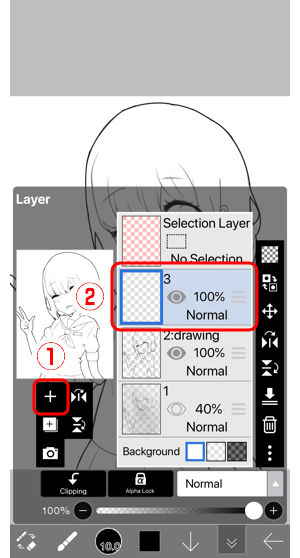
Open the layer window and tap the ① "+" button to add a new layer for an undercoat. Next, tap the ② Added layer to make it active.
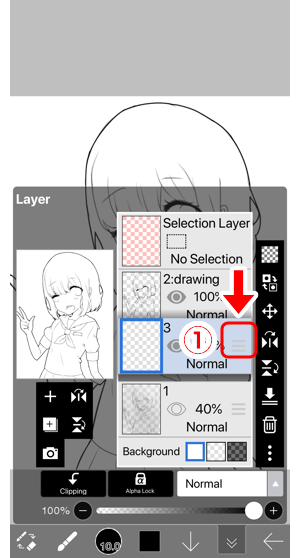
The undercoat layer is beneath the line drawing. Drag down the ①Thumbnail to rearrange the layers.
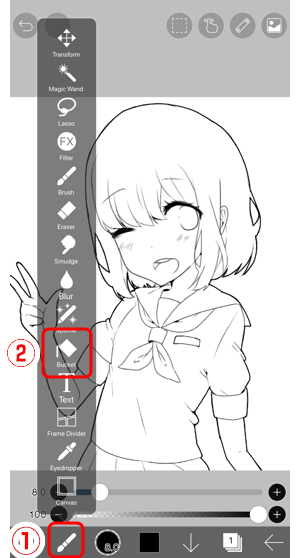
Tap the Bucket button on the ① Tool Selection window and select the ② Bucket tool.
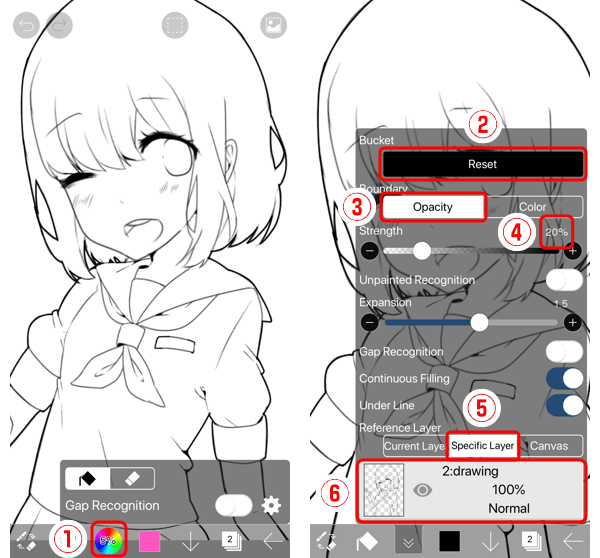
Tap ①% on the circle button to open the Bucket Settings window .
First, tap ②Reset to reset the value to default.
The fill will take the transparency level and color of the starting point and fill in everything within a certain range of the starting point color and transparency at the same transparency level and color. If you would to use the line drawing layer as a boundary, it is a good idea to set ③ Opacity at the boundary of your fill range. If you wish to set the Fill Layer or a part of a photo as a boundary, set Color at the boundary of your fill range. We want to use the drawn lines as a boundary in this case, so please tap ③ Opacity.
The Strength percentage bar sets the level at which the transparency has to differ from the transparency of the fill start point before a boundary is created. For example, if you set the bar to 0%, only parts of the layer with exactly the same transparency will be filled in. If you select 90%, if the transparency of the start point is 100%, parts of the layer up to 10% transparency (almost opaque) will be filled in. If you select 100%, the whole layer will be filled in regardless of transparency at the start point. In this case, we want to set the ④ Strength percentage to 20%.
Next the Reference Layer function. If you select the Current Layer, the Current Layer will be read and filled in.
In the case of selecting the Specific Layer, the Specfic Layer that is selected in ⑥ Layer Row is read, and the Current Layer is filled in. When the Canvas Layer is selected, a picture using all the layers combined is read, and the Current Layer is filled in. In this case we are using the sketch as our reference point and want to fill in the Current Layer. Therefore we want to select ⑤ Specific Layer, tap ⑥ Layer Row, and then select Line Drawing Layer.
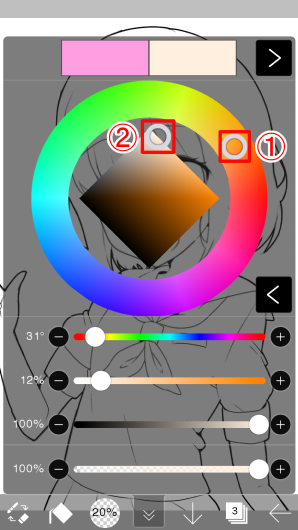
Select a color from the Color window. Here we select the ① Hue Thumb and ② Saturation Thumb and drag them to select a skin-tone color.
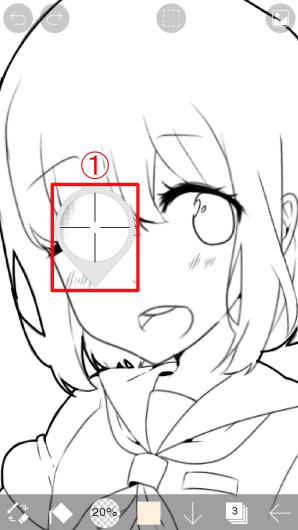
Now let's fill in the skin color. Tapping inside the line drawing will fill in the entire area. If there are leaks or the entire layer is filled in then press the Undo button (Go back one step).
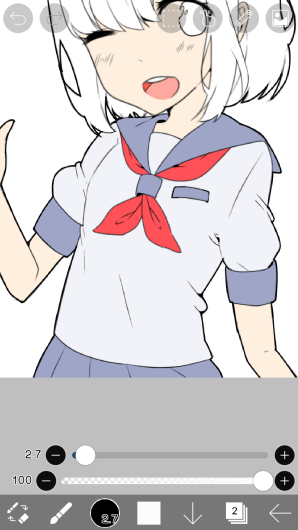
The figure above shows how the skin and cloth color has been changed with the Bucket tool.
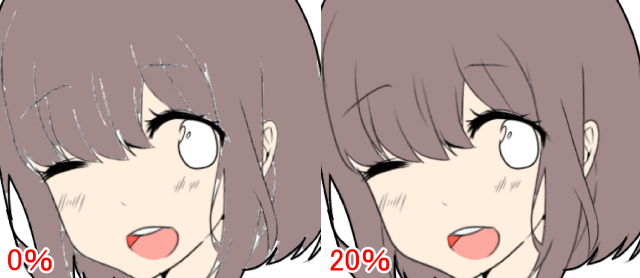
The figure above shows the difference between a strength setting of 0% and 20%. You can see how a stronger setting leads to more area being filled in. If there are gaps between the fill and the lines then increase the strength as much as possible. Also, expansion it can decrease the number of gaps.
I believe it's difficult to grasp the Bucket settings. We often hear people say, "I can't use the Bucket tool because it is buggy. It always fills the entire canvas." but if you don't understand it yet, try setting the Edge to Color 10% and the Reference Layer to Canvas and you should achieve the desired results. Also, the Easy Settings often allow one to use the Bucket tool accurately, so if you don't quite understand the setting yet then turning on "Easy Settings" may help.
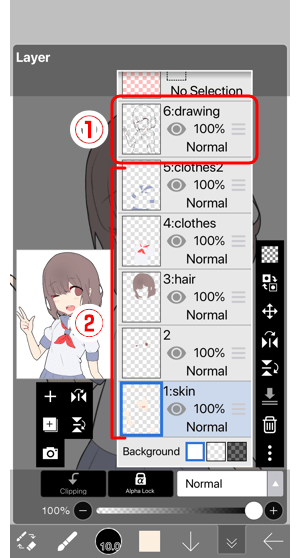
After successfully filling in the layer window it will look like this when opened. ① is the line drawing layer, ② is the undercoat fill layers. Once the undercoat is complete you can easily fill in that area with Clipping or select it with the Magic Wand.
Chapter
-
 01.Introduction
 -
 02.Start Creating an Artwork
 -
 03.Toolbar and Tool Selection
 -
 04.Do Your Draft Sketch by Hand
 -
 05.About Layers
 -
 06.Let's Trace
 -
 07.Undo and Eraser
 -
 08.Fine Tuning Using the Lasso tool
 -
 09.Check by Reflecting Horizontally
 -
 10.Select Colors in the Color window
 -
 11.Use Color Fill for the Undercoat
 -
 12.Turn Clipping On
 -
 13.Making a Gradation (Shading)
 -
 14.Select a color from the canvas or layer
 -
 15.Set the Time before Quick Eyedropper Starts
 -
 16.Create Highlights and Shadows
 -
 17.Paste a Texture
 -
 18.Let's Merge Layers
 -
 19.Sign Your Artwork
 -
 20.View Your Artwork
 -
 21.Post Your Artwork
 -
 22.Share Your Artwork
 -
 23.Open your ibisPaint data in Clip Studio Paint
 -
 24.Premium Membership / Ad Removal Upgrade (for iPhone/iPad, Android)
 -
 25.Premium Membership / Pro Upgrade (for Windows, Mac)
 -
 26.Smart Features and Smart Credits
 -
 27.Synchronizing the artworks on your device with Cloud Storage
 -
 28.Save the past state of an Artwork as an IPV file
 -
 29.Rearrange artworks
 -
 30.Artworks Folder Feature
 -
 31.Make custom brush
 -
 32.Create Original Brush Patterns
 -
 33.Installing and Exporting the Custom Brush
 -
 34.Release a Custom Brush to the Online Gallery
 -
 35.Brush Export and Import
 -
 36.Search For Brushes
 -
 37.Display images to use as reference
 -
 38.Add Color to the Analog Image using Multiply
 -
 39.Stabilizer
 -
 40.Layer: Clipping is convenient
 -
 41.Layer: Changing the color with Alpha Lock
 -
 42.Layer: Let's try using Screen Tone
 -
 43.Layer: Selection Layer
 -
 44.Layer: Save Layer as Transparent PNG command
 -
 45.Layer: Naming your layers to manage them
 -
 46.Layer: Rasterize
 -
 47.Layer: Layer Folders
 -
 48.Layer: Folder Move/Transform
 -
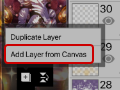 49.Layer: Add Layer from Canvas
 -
 50.Vector Layer
 -
 51.How to edit a brush shape
 -
 52.Contents Layer Selection
 -
 53.Apply Canvas Papers to your canvas
 -
 54.Display Grid on the Canvas
 -
 55.Export an Artwork (Save)
 -
 56.Export in CMYK (Save)
 -
 57.Save canvas as Transparent PNG
 -
 58.Make the background transparent with Eraser Bucket
 -
 59.Bucket Tool: Surrounding Fill / Surrounding Eraser
 -
 60.Putting texture to the floor with Perspective Form
 -
 61.Skirt with Mesh Form
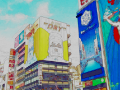
 -
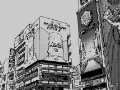
 62.Entering text with Text tool
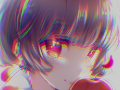
 -
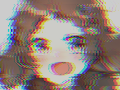
 63.Creating manga with Frame Divider tool
 -
 64.Enlarging the canvas with Canvas Size
 -
 65.Cutting off the canvas with Trim
 -
 66.Create a Manga Manuscript for Printing
 -
 67.Canvas creation with resolution (dpi) specification
 -
 68.Changing image resolution with Resize
 -
 69.Change canvas Color Mode
 -
 70.Output High-Resolution Images with AI (Artificial Intelligence)
 -
 71.AI Disturbance
 -
 72.Texture with Material tool
 -
 73.Cut, Copy, Paste
 -
 74.Ruler: Straight Ruler
 -
 75.Ruler: Circular Ruler
 -
 76.Ruler: Elliptical Ruler
 -
 77.Ruler: Radial Ruler
 -
 78.Ruler: Mirror Ruler
 -
 79.Ruler: Kaleidoscope Ruler
 -
 80.Ruler: Array Ruler
 -
 81.Ruler: Perspective Array Ruler
 -
 82.Drawing Tool: Straight Line
 -
 83.Drawing Tool: Rectangle
 -
 84.Drawing Tool:Circle
 -
 85.Drawing Tool:Ellipse
 -
 86.Drawing Tool:Regular Polygon
 -
 87.Drawing Tool:Bezier Curve
 -
 88.Drawing Tool:Polyline
 -
 89.Drawing Tool:Fill
 -
 90.Selection Area tool: Color Range
 -
 91.Selection Area tool: Expand/Contract Selection Area
 -
 92.Special: Liquify Pen
 -
 93.Special: Lasso Fill
 -
 94.Special: Lasso Eraser
 -
 95.Special: Copy Pen
 -
 96.Filter (Adjust Color): Brightness & Contrast
 -
 97.Filter (Adjust Color): Tone Curve
 -
 98.Filter (Adjust Color): Hue Saturation Lightness
 -
 99.Filter (Adjust Color): Color Balance
 -
 100.Filter (Adjust Color): Extract Line Drawing
 -
 101.Filter (Adjust Color): Find Edges (Handwriting)
 -
 102.Filter (Adjust Color): Find Edges
 -
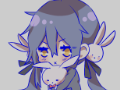 103.Filter (Adjust Color): Change Drawing Color
 -
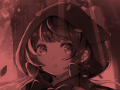 104.Filter (Adjust Color): Mono Color
 -
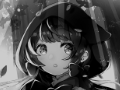 105.Filter (Adjust Color): Grayscale
 -
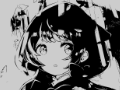 106.Filter (Adjust Color): Black & White
 -
 107.Filter (Adjust Color): Posterize
 -
 108.Filter (Adjust Color): Invert Color
 -
 109.Filter (Adjust Color): Gradation Map
 -
 110.Filter (Adjust Color): Levels Adjustment
 -
 111.Filter (Adjust Color): Replace Color
 -
 112.Filter (Blur): Gaussian Blur
 -
 113.Filter (Blur): Zooming Blur
 -
 114.Filter (Blur): Moving Blur
 -
 115.Filter (Blur):Spin Blur
 -
 116.Filter (Blur): Lens Blur
 -
 117.Filter (Blur): Mosaic
 -
 118.Filter (Blur): Unsharp Mask
 -
 119.Filter (Blur): Frosted Glass
 -
 120.Filter (Style): Stroke (Both)
 -
 121.Filter (Style): Stained Glass
 -
 122.Filter (Style): Wet Edge
 -
 123.Filter (Style): Glow (Inner)
 -
 124.Filter (Style): Bevel (Inner)
 -
 125.Filter (Style): Bevel (Outer)
 -
 126.Filter (Style): Emboss
 -
 127.Filter (Style): Relief
 -
 128.Filter (Style): Waterdrop (Rounded)
 -
 129.Filter (Style): Stroke (Outer)
 -
 130.Filter (Style): Glow (Outer)
 -
 131.Filter (Style): Satin
 -
 132.Filter (Style): Drop Shadow
 -
 133.Filter (Style): Extrude
 -
 134.Filter (Style): God Rays
 -
 135.Filter (Draw): Parallel Gradation
 -
 136.Filter (Draw): Concentric Gradation
 -
 137.Filter (Draw): Radial Line Gradation
 -
 138.Filter (Draw): Radial Line
 -
 139.Filter (Draw): Speed Line
 -
 140.Filter (Draw): Clouds
 -
 141.Filter (Draw): QR Code
 -
 142.Filter (Smart): Watercolor Filter
 -
 143.Filter (AI): Background Removal
 -
 144.Filter (Artistic): Anime Background
 -
 145.Filter (Artistic): Manga Background
 -
 146.Filter (Artistic): Chromatic Aberration (Color Shift, RGB Shift)
 -
 147.Filter (Artistic): Glitch
 -
 148.Filter (Artistic): Noise
 -
 149.Filter (Artistic): Retro Game
 -
 150.Filter (Artistic): Chrome
 -
 151.Filter (Artistic): Bloom
 -
 152.Filter (Artistic): Cross Filter
 -
 153.Filter (Artistic): Sheer
 -
 154.Filter (Pixelate): Pixelate Crystalize
 -
 155.Filter (Pixelate): Hexagonal Pixelate
 -
 156.Filter (Pixelate): Square Pixelate
 -
 157.Filter (Pixelate): Triangular Pixelate
 -
 158.Filter (Pixelate): Pointillize
 -
 159.Filter (Pixelate): Dots (Hexagonal)
 -
 160.Filter (Pixelate): Dots (Square)
 -
 161.Filter (Transform): Expansion
 -
 162.Filter (Transform): Fisheye Lens
 -
 163.Filter (Transform): Sphere Lens
 -
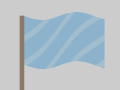 164.Filter (Transform): Wave
 -
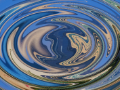 165.Filter (Transform): Ripple
 -
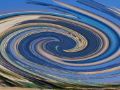 166.Filter (Transform): Twirl
 -
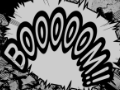 167.Filter (Transform): Polar Coordinates
 -
 168.Filter (Frame): Table
 -
 169.Filter (Frame): Blur Frame
 -
 170.Filter (Movie): Rain
 -
 171.Adjustment Layer
 -
 172.Create an animation
 -
 173.Animation Feature: Video Mode
 -
 174.Animation Feature: Audio Tracks in Video Mode
 -
 175.Manga Function: Let's create a manga manuscript
 -
 176.Manga Function: Master the Manga creation tools
 -
 177.Manga Function: Make Use of Materials
 -
 178.Manga Function: Publishing and Printing your Manga
 -
 179.Changing Devices & File Transfers
 -
 180.Settings window details
 -
 181.Change the Background Color of the Canvas
 -
 182.Details of Brush Parameters
 -
 183.Bucket tool details
 -
 184.Layer Window Details
 -
 185.Transform tool details
 -
 186.Blend mode details
 -
 187.View Menu details
 -
 188.How to upload transparent PNG onto X
 -
 189.Importing and exporting Photoshop files (PSD)
 -
 190.Posting Multiple Pages of Comic to the Online Gallery
 -
 191.Gestures, Keyboard shortcuts (iOS,iPadOS,Android versions)
 -
 192.Gestures, Keyboard shortcuts (Windows Version)
 -
 193.Display a Crosshair Symbol When Hovering the Stylus Pen
 -
 194.Set Up Palm Rejection
 -
 195.Use a Promo Code
 -
 196.About ibisAccount: Creating an Account
 -
 197.About ibisAccount: Log In
 -
 198.About ibisAccount: Delete Your Account
- Artwork Rankings

- Artist Rankings
- Official accounts


