![]()

News
Tutorials
80. Ruler: Perspective Array Ruler
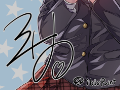
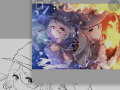
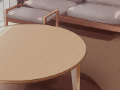
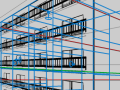
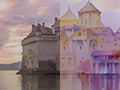
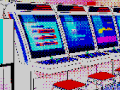
From the Perspective Array Ruler in the Ruler tool you can render accurately drawings from a single-point perspective, two-point perspective, and three-point perspective. You can slo combine with the Straight Ruler, Circular Ruler, and Radial Ruler to render backgrounds. Here I have tired to create an apartment block.
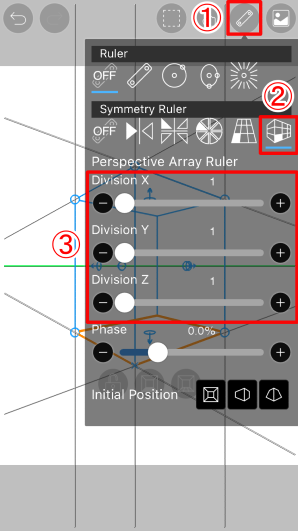
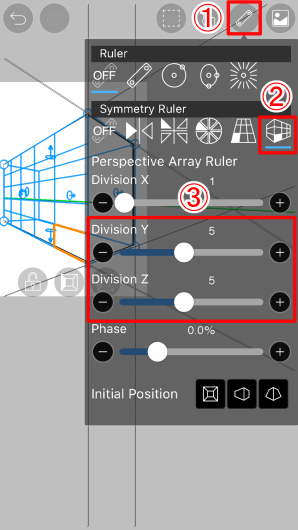
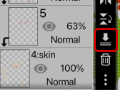
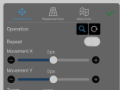
From the ① Ruler function select the ② Perspective Array Ruler. The initial number of fractals is set to 3 for each Division, but, apart from the Phase slider, set all ③ Divisions to 1.
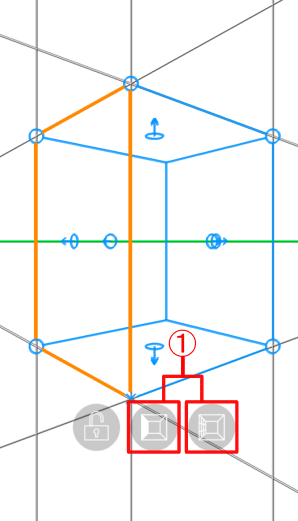
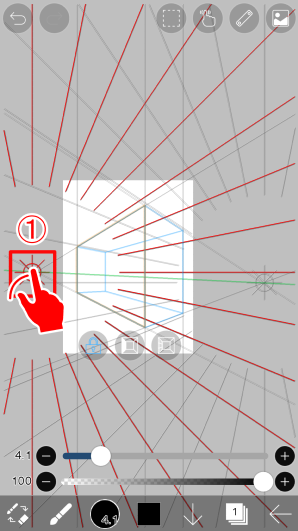
Since the cube we are drawing is facing left, selecting the ① Face Selection button under the ruler functions and setting to facing right allows us to cleanly trace the cube we have created.
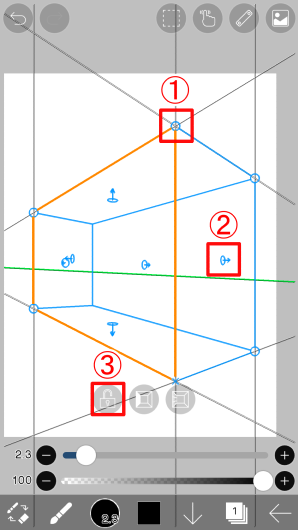
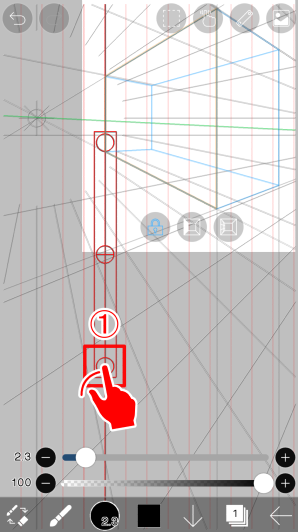
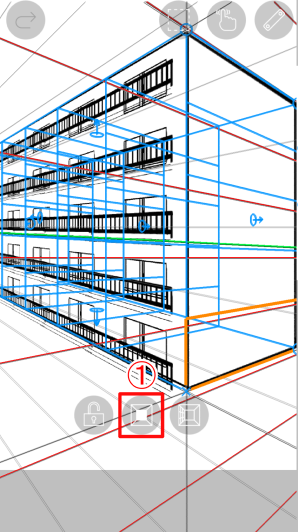
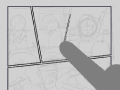
Return to the Canvas screen and drag the ① Vertex Thumb and ② Face Thumb to determine the size, position and orientation of your cube. When you have arranged your cube to your satisfaction, tap the ③ Lock button.
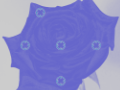
Open the ① Ruler tooland select the ② Radial Ruler.
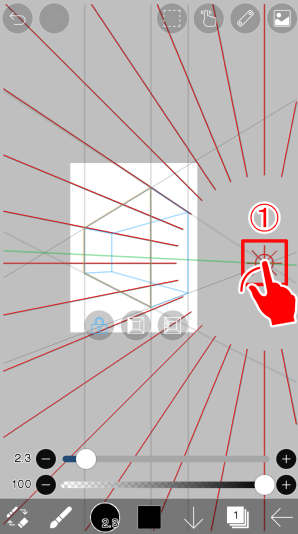
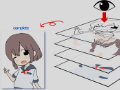
Drag the ① Center Thumb to match the vanishing point.
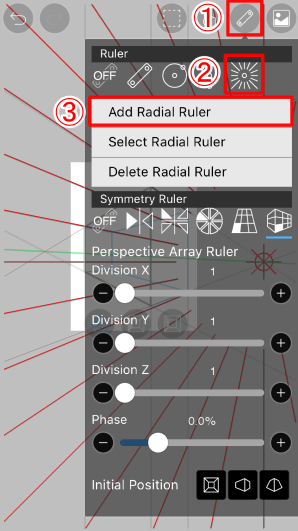
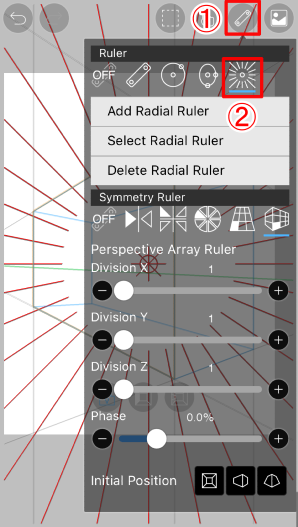
Since it is a two-point perspective, we need to match it to two vanishing points. When we want to add a Radial Ruler, from the ① Ruler Tool we select the ② Radial Ruler. By tapping ③ Add Radial Ruler we are able to match to the second vanishing point.
Drag the ① Center Thumb to match the second vanishing point.

When you have positioned the radial mesh correctly, from the ① Ruler tool select the ② Straight Ruler.
Drag the ① Rotation Thumb and position it vertically.
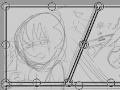
Along the line of the Perspective Array Ruler we now draw a line using the the ① Radial Ruler.

From the ① Ruler tool select the ② Radial Ruler, and choose ③ Select Radial Ruler.

When you choose the Select Radial Ruler option it will look something like this and so by selecting ① arrow you can switch between the two.
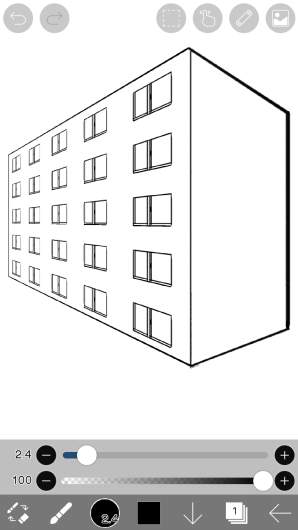
When we have drawn a cube, from the ① Ruler tool we select the ② Perspective Array Ruler and drag the ③ Division Y, Division Z sliders right to determine the number of rooms. This time, we have set Y:5, Z:5.
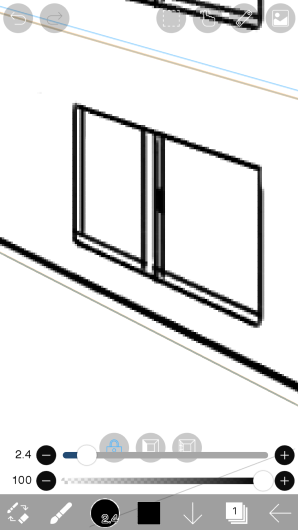
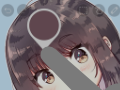
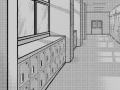
We will now use the Radial Ruler and Straight Ruler to draw a window in the orange work cell.
This window is duplicated in the grid array, so it is easy to draw many windows.
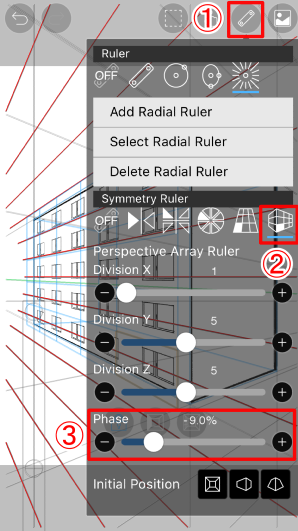
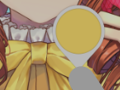
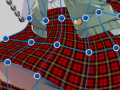
Next we will draw a veranda. Leaving the work surface as it is, from the ① Ruler toll select the ② Perspective Array Ruler and drag the ③ Phase slider right to -9.0% .
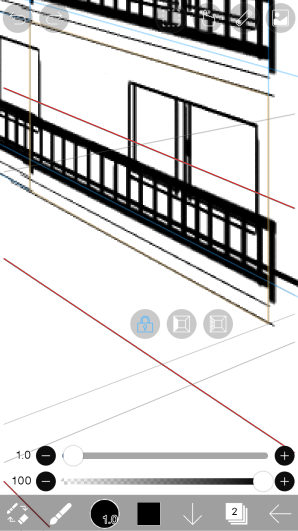
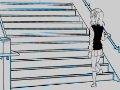
In the orange work cell use the Radial and Straight Ruler to draw a fence.
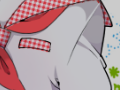
We will now draw the veranda's fence. Set ① Face Selection button to front face.

From the ① Ruler tool select the ② Perspective Array Ruler and set ③ Phase to -1.0%. Now draw a horizontal fence in the orange work cell.

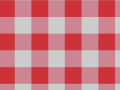
The Radial Ruler and the Straight Ruler were used to draw the fence.
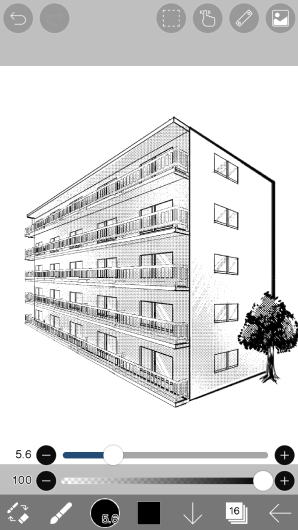
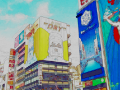
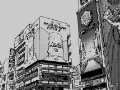
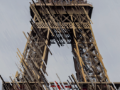
This is useful when drawing a building using perspective.
Chapter
-
 01.Introduction
 -
 02.Start Creating an Artwork
 -
 03.Toolbar and Tool Selection
 -
 04.Do Your Draft Sketch by Hand
 -
 05.About Layers
 -
 06.Let's Trace
 -
 07.Undo and Eraser
 -
 08.Fine Tuning Using the Lasso tool
 -
 09.Check by Reflecting Horizontally
 -
 10.Select Colors in the Color window
 -
 11.Use Color Fill for the Undercoat
 -
 12.Turn Clipping On
 -
 13.Making a Gradation (Shading)
 -
 14.Select a color from the canvas or layer
 -
 15.Set the Time before Quick Eyedropper Starts
 -
 16.Create Highlights and Shadows
 -
 17.Paste a Texture
 -
 18.Let's Merge Layers
 -
 19.Sign Your Artwork
 -
 20.View Your Artwork
 -
 21.Post Your Artwork
 -
 22.Share Your Artwork
 -
 23.Open your ibisPaint data in Clip Studio Paint
 -
 24.Premium Membership / Ad Removal Upgrade (for iPhone/iPad, Android)
 -
 25.Premium Membership / Pro Upgrade (for Windows, Mac)
 -
 26.Synchronizing the artworks on your device with Cloud Storage
 -
 27.Save the past state of an Artwork as an IPV file
 -
 28.Rearrange artworks
 -
 29.Artworks Folder Feature
 -
 30.Make custom brush
 -
 31.Create Original Brush Patterns
 -
 32.Installing and Exporting the Custom Brush
 -
 33.Release a Custom Brush to the Online Gallery
 -
 34.Brush Export and Import
 -
 35.Search For Brushes
 -
 36.Display images to use as reference
 -
 37.Add Color to the Analog Image using Multiply
 -
 38.Stabilizer
 -
 39.Layer: Clipping is convenient
 -
 40.Layer: Changing the color with Alpha Lock
 -
 41.Layer: Let's try using Screen Tone
 -
 42.Layer: Selection Layer
 -
 43.Layer: Save Layer as Transparent PNG command
 -
 44.Layer: Naming your layers to manage them
 -
 45.Layer: Rasterize
 -
 46.Layer: Layer Folders
 -
 47.Layer: Folder Move/Transform
 -
 48.Layer: Add Layer from Canvas
 -
 49.Vector Layer
 -
 50.How to edit a brush shape
 -
 51.Contents Layer Selection
 -
 52.Apply Canvas Papers to your canvas
 -
 53.Display Grid on the Canvas
 -
 54.Export an Artwork (Save)
 -
 55.Export in CMYK (Save)
 -
 56.Save canvas as Transparent PNG
 -
 57.Make the background transparent with Eraser Bucket
 -
 58.Bucket Tool: Surrounding Fill / Surrounding Eraser
 -
 59.Putting texture to the floor with Perspective Form
 -
 60.Skirt with Mesh Form
 -
 61.Entering text with Text tool
 -
 62.Creating manga with Frame Divider tool
 -
 63.Enlarging the canvas with Canvas Size
 -
 64.Cutting off the canvas with Trim
 -
 65.Create a Manga Manuscript for Printing
 -
 66.Canvas creation with resolution (dpi) specification
 -
 67.Changing image resolution with Resize
 -
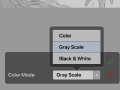 68.Change canvas Color Mode
 -
 69.Output High-Resolution Images with AI (Artificial Intelligence)
 -
 70.AI Disturbance
 -
 71.Texture with Material tool
 -
 72.Cut, Copy, Paste
 -
 73.Ruler: Straight Ruler
 -
 74.Ruler: Circular Ruler
 -
 75.Ruler: Elliptical Ruler
 -
 76.Ruler: Radial Ruler
 -
 77.Ruler: Mirror Ruler
 -
 78.Ruler: Kaleidoscope Ruler
 -
 79.Ruler: Array Ruler
 -
 80.Ruler: Perspective Array Ruler
 -
 81.Drawing Tool: Straight Line
 -
 82.Drawing Tool: Rectangle
 -
 83.Drawing Tool:Circle
 -
 84.Drawing Tool:Ellipse
 -
 85.Drawing Tool:Regular Polygon
 -
 86.Drawing Tool:Bezier Curve
 -
 87.Drawing Tool:Polyline
 -
 88.Drawing Tool:Fill
 -
 89.Selection Area tool: Color Range
 -
 90.Selection Area tool: Expand/Contract Selection Area
 -
 91.Special: Liquify Pen
 -
 92.Special: Lasso Fill
 -
 93.Special: Lasso Eraser
 -
 94.Special: Copy Pen
 -
 95.Filter (Adjust Color): Brightness & Contrast
 -
 96.Filter (Adjust Color): Tone Curve
 -
 97.Filter (Adjust Color): Hue Saturation Lightness
 -
 98.Filter (Adjust Color): Color Balance
 -
 99.Filter (Adjust Color): Extract Line Drawing
 -
 100.Filter (Adjust Color): Find Edges (Handwriting)
 -
 101.Filter (Adjust Color): Find Edges
 -
 102.Filter (Adjust Color): Change Drawing Color
 -
 103.Filter (Adjust Color): Mono Color
 -
 104.Filter (Adjust Color): Grayscale
 -
 105.Filter (Adjust Color): Black & White
 -
 106.Filter (Adjust Color): Posterize
 -
 107.Filter (Adjust Color): Invert Color
 -
 108.Filter (Adjust Color): Gradation Map
 -
 109.Filter (Adjust Color): Levels Adjustment
 -
 110.Filter (Adjust Color): Replace Color
 -
 111.Filter (Blur): Gaussian Blur
 -
 112.Filter (Blur): Zooming Blur
 -
 113.Filter (Blur): Moving Blur
 -
 114.Filter (Blur):Spin Blur
 -
 115.Filter (Blur): Lens Blur
 -
 116.Filter (Blur): Mosaic
 -
 117.Filter (Blur): Unsharp Mask
 -
 118.Filter (Blur): Frosted Glass
 -
 119.Filter (Style): Stroke (Both)
 -
 120.Filter (Style): Stained Glass
 -
 121.Filter (Style): Wet Edge
 -
 122.Filter (Style): Glow (Inner)
 -
 123.Filter (Style): Bevel (Inner)
 -
 124.Filter (Style): Bevel (Outer)
 -
 125.Filter (Style): Emboss
 -
 126.Filter (Style): Relief
 -
 127.Filter (Style): Waterdrop (Rounded)
 -
 128.Filter (Style): Stroke (Outer)
 -
 129.Filter (Style): Glow (Outer)
 -
 130.Filter (Style): Satin
 -
 131.Filter (Style): Drop Shadow
 -
 132.Filter (Style): Extrude
 -
 133.Filter (Style): God Rays
 -
 134.Filter (Draw): Parallel Gradation
 -
 135.Filter (Draw): Concentric Gradation
 -
 136.Filter (Draw): Radial Line Gradation
 -
 137.Filter (Draw): Radial Line
 -
 138.Filter (Draw): Speed Line
 -
 139.Filter (Draw): Clouds
 -
 140.Filter (Draw): QR Code
 -
 141.Filter (AI): Watercolor Filter
 -
 142.Filter (AI): Background Removal
 -
 143.Filter (Artistic): Anime Background
 -
 144.Filter (Artistic): Manga Background
 -
 145.Filter (Artistic): Chromatic Aberration (Color Shift, RGB Shift)
 -
 146.Filter (Artistic): Glitch
 -
 147.Filter (Artistic): Noise
 -
 148.Filter (Artistic): Retro Game
 -
 149.Filter (Artistic): Chrome
 -
 150.Filter (Artistic): Bloom
 -
 151.Filter (Artistic): Cross Filter
 -
 152.Filter (Artistic): Sheer
 -
 153.Filter (Pixelate): Pixelate Crystalize
 -
 154.Filter (Pixelate): Hexagonal Pixelate
 -
 155.Filter (Pixelate): Square Pixelate
 -
 156.Filter (Pixelate): Triangular Pixelate
 -
 157.Filter (Pixelate): Pointillize
 -
 158.Filter (Pixelate): Dots (Hexagonal)
 -
 159.Filter (Pixelate): Dots (Square)
 -
 160.Filter (Transform): Expansion
 -
 161.Filter (Transform): Fisheye Lens
 -
 162.Filter (Transform): Sphere Lens
 -
 163.Filter (Transform): Wave
 -
 164.Filter (Transform): Ripple
 -
 165.Filter (Transform): Twirl
 -
 166.Filter (Transform): Polar Coordinates
 -
 167.Filter (Frame): Table
 -
 168.Filter (Frame): Blur Frame
 -
 169.Filter (Movie): Rain
 -
 170.Adjustment Layer
 -
 171.Create an animation
 -
 172.Manga Function: Let's create a manga manuscript
 -
 173.Manga Function: Master the Manga creation tools
 -
 174.Manga Function: Make Use of Materials
 -
 175.Manga Function: Publishing and Printing your Manga
 -
 176.Changing Devices & File Transfers
 -
 177.Settings window details
 -
 178.Change the Background Color of the Canvas
 -
 179.Details of Brush Parameters
 -
 180.Bucket tool details
 -
 181.Layer Window Details
 -
 182.Transform tool details
 -
 183.Blend mode details
 -
 184.View Menu details
 -
 185.How to upload transparent PNG onto X
 -
 186.Importing and exporting Photoshop files (PSD)
 -
 187.Posting Multiple Pages of Comic to the Online Gallery
 -
 188.Gestures, Keyboard shortcuts (iOS,iPadOS,Android versions)
 -
 189.Gestures, Keyboard shortcuts (Windows Version)
 -
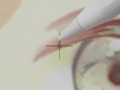 190.Display a Crosshair Symbol When Hovering the Stylus Pen
 -
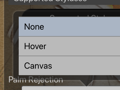 191.Set Up Palm Rejection
 -
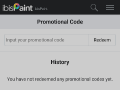 192.Use a Promo Code
 -
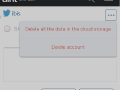 193.Delete Account
- Artwork Rankings
- Artist Rankings
- Official accounts


